Tuesday, 16 November 2021

The Black Down Decoy Site (1940-44)

 From January 1940 onwards, an elaborate decoy strategy designed to protect urban areas from aerial bombardment was planned and implemented. Over the course of the next 18 months or so no fewer than 602 such sites were built. There were four types of decoy - dummy aerodromes (K and Q sites), diversionary fires (QF and Starfish), simulated urban lighting (QL sites) and dummy factories and buildings. The QF diversionary site at Black Down is one of the few that wasn't totally eradicated after the end of the Second World War.

Control Bunker - Black Down QF Site

Black Down is the highest point in the Mendip Hills, offering a spectacular view of the Chew Valley. It is close to Cheddar (BS40 7XU / OS Grid: ST 470564) and the QF site can be accessed via a steep path adjacent to Tynings Farm. The site, which formed part of Bristol's defences, operated in tandem with a QL simulated lighting system and Z anti-aircraft rocket battery to the south. The western control bunker is on top of the hill at the end of the steep access path leading up from the farm. It's not possible to get inside but most of the structure is clearly visible, including the blast wall protecting the main entrance.

Tynings Farm and the site of the QL decoy beyond

After a couple of hundred yards beyond the western control bunker (from which both the QF and the QL sites could be triggered) at the top of the access path turn right and walk up towards the trig point on the summit of the hill. The landscape in front of you is punctuated by channels and mounds which, in war time, supported various materials and devices for simulating a city on fire. One can also discern firebreak trenches which enclosed emplacements used for simulating burning building.

Old military road up to the trig point
Simulated Bristol Targets

The planners went to considerable lengths to replicate potential sites in Bristol, the configuration of factories, railways and houses was copied and the site would be lit up on the approach of Luftwaffe bombers, the intention being that they bomb these open spaces in the mistaken belief that they were hitting Bristol. For example Temple Meads was simulated at Point C on the above map. In this instance there was a combination of QL and F features i.e. a lit up area, partially on fire.

Bronze Age Bowl Barrow

At the trig point on Beacon Batch there are a number of Bronze Age burial barrows of which two are particularly prominent (see picture above). From this point look east towards the two masts. The QL site mimicking Bristol's Eastern Depot was situated in that area. There is a second control bunker to the south of this spot on the southern boundary of the Black Down designated site.


500  metres to the south of Tynings Farm there is a bunker with blast wall which was almost certainly the control centre for the Z Battery based in this area. The Z Batteries were manned by Home Guard units and developed from a single-rocket launcher into more sophisticated projectors which could fire a salvo of 36 at the touch of a button. The combination of decoys and ground to air fire power was a potent threat to enemy bomber forces - tricked into releasing their bombs to early, in doing so they were exposed to rocket attack.

Friday, 1 October 2021

The Fortified Island of Flat Holm

 From 1870 to 1900 the Severn Estuary was protected by four interlocked forts - Brean Down, Lavernock Point, Steep Holm and Flat Holm. Later, during the Second World War, these sites were redeveloped and brought back into use. Nowadays all of these sites can be visited, and each one is unique and of special interest. Last month I managed to get to Flat Holm Island, the journey itself was a bit of an adventure in that the only way of getting there is in a rib running out of Cardiff Bay.

The Landing Beach - Flat Holm

In Victorian times there were four batteries on the island: Lighthouse, Well, Farmhouse and Castle Rock. Because of the relatively low and exposed terrain the nine 7" Rifled Muzzle Loading (RML) guns deployed on the island, were all mounted on Moncrieff Disappearing Carriages. Many of the guns are still on the island, as they were difficult to salvage, but the carriages are long gone. The sunken gun pits are there to explore as are the tunnels, ammunition stores and the original 1869 barrack block (now a pub, small museum and visitor hub). 

Gun Pit at Lighthouse Battery, Flat Holm

Moncrieff Carriage in Gun Pit

The quarters provided on the island were good for fifty men but generally the island was served by a Master Gunner and five lower ranks. The gun pits were constructed from limestone blocks and bricks - they are 18 ft in diameter and 10 ft deep. When firing their 115-pound shells, the recoil forced the gun into the down position (see illustration above). It was then reloaded and, with the aid of a counter weight, raised ready for firing again. The guns were only fired in tests and in 1888 the R.A. and R.E. Works Committee recommended that a number of the guns be replaced with a 6" breech loading (BL) gun and two 3" quick firing (QF) variants. These upgrades never happened.

The 1869 Barracks & Lighthouse

7" RML Gun at Lighthouse Battery

During what is sometimes referred to as the 'second military occupation' from 1940 to 44, over 350 soldiers were based on Flat Holm. Two anti-aircraft (AA) batteries were established, both consisting of two heavy, 4.5" AA Mark II guns, a command post, and were flanked by two searchlights. Bofor and Lewis guns augmented the AA armament. The batteries were constructed from mid 1941 and throughout 1942 - sometime after the main raids on Cardiff and Bristol between October 1940 and May 1941.

1941 era AA Gun Position - Farmhouse Battery

Searchlight Building and Store - Farmhouse Battery

The pictures of Farmhouse Battery above, illustrate the strategic value of Flat Holm Island. The coastline in the distance is the Weston-super-Mare / Sand Bay stretch of Somerset shoreline, defended by the fort at Brean Down. Steep Holm Island can be seen in the second picture. The main deep water channel up to Bristol and into the Severn Estuary runs between the islands. 

We can garner some idea of what the batteries were like in the wartime years through the work of war artist Ray Howard-Jones (1903-96). After being accredited as an official war artist Penarth based Ray spent several months on Flat Holm and Steep Holm in 1942, leaving a rich legacy of contemporary paintings. The painting below, showing two newly installed A.A. guns is reprinted with the kind permission of the National Museum of Wales and Nicola Howard-Jones. 

Lighthouse Battery under Construction - 1942

Flat Holm became non-operational in December 1944 and in 1945/6 German prisoners of war removed most of the equipment and many of the pre-fabricated structures. Aside from the batteries, ammunition stores, control bunkers and searchlight positions visitors can explore the remains of a G.L. Mk II radar platform and ramp, plus a number of other wartime structures such as the old gas attack store and guard house.

Ramp to G.L. Mk II radar platform

Open Moncrieff Gun at Well Battery

As is the case with Lavernock, Brean Down and Steep Holm it is interesting to see how Victorian fortifications have been reused in later conflicts. The sites chosen in the 1860s and 70s remained relevant in later times and although the gun pits required a radical new approach, some of the other buildings were re-used. The picture immediately above shows an open-backed Moncreiff gun position at Well Battery on Flat Holm, with a 1941 era structure built where the original Victorian artillery piece was originally mounted.

Main References
'A History of Maritime Forts in the Bristol Channel' by J.H.Barrett
'Flat Holm Island: Rich in wildlife, steeped in history' from Cardiff City Council
Bay Island Voyages: https://www.bayislandvoyages.co.uk/


Wednesday, 18 August 2021

The Lundy Island Heinkels (1941)

Lundy Island, in the Bristol Channel, is a remote and beautiful place which attracts a limited number of visitors, particularly in the two or three months up until the end of July when the Puffins are around. Their spectacularly colourful beaks and liking for precarious cliff-top locations, make them an attractive subject for bird watchers and photographers. To some extent I was drawn to the island by the prospect of seeing birds as well - but not the feathered variety, rather the remnants of two German Heinkel HE III bombers which crash landed on Lundy in 1941.

3 March 1941, Heinkel HE II Crash Site

The Bristol Channel was a critical lifeline for Britain during the Second World War. The deep water passages around Lundy were (and still are) used by a huge number of merchant vessels heading for Avonmouth, Portishead, South Wales and smaller ports further up in the Severn Estuary. During the Battle of Britain period the Heinkels of Kampfgeschwader 27 Boelcke (KG 47) were active over the area. Often operating in pairs, the German raiders would seek out and and attempt to sink merchant vessels in the Channel. Their leader, Oswald Boelke, was a a First World War fighter ace and the squadron sported an emblem showing a black eagle with red beak and claws overlayed with a sword.

Lundy Island in the Bristol channel

The history of the two Lundy Island Heinkels has been thoroughly researched by the South West Aviation Historical Society and made public in Graham Lewis's excellent booklet Eagles on Lundy (from Leesthorpe Publishing). The history is one thing, but would I be able to find the crash sites and would there be anything to see? I knew one was readily accessible but the other one looked like it might be a challenge, particularly since the aircraft crashed into a cliff face on the wild and windswept western side of the island.

All That Remains at the First Crash Site

The first crash on the 3rd March 1941 resulted in no fatalities. The Heinkel medium bomber had taken off as one of a pair from its base near Brest in France. Just off the Welsh Coast the two aircraft spotted a Dutch merchantman, the SS Simaloer and proceeded to attack. The bombs missed but as the second aircraft passed over the target, the gun crew on the Simaloer managed to disable the plane's port engine. The pilot gained a few hundred metres before spotting what he thought were was one of the Scilly Isles. Anxious not to land on water, the pilot managed to crash land the aircraft on what turned out to be Lundy Island. 

Looking south towards the First Crash Site

Graham's book tells us that the five crew scrambled out of the aircraft and that the navigator fired a signal pistol into the fuel tanks. The crash site still bares witness to this in that there is a circle of ground devoid of vegetation and covered in shards of melted aluminium. A local lighthouse keeper was the first on scene and was somewhat non-plussed to find that the flyers were not Polish, but German. To avoid retribution from vengeful locals, the Germans concocted a story about searching for a missing aircraft. The true nature of their mission was subsequently uncovered during interrogation and the five men went into captivity as PoWs. The youngest member of the crew, Elma Botcher, returned to the island and the crash site in 1991 where he was received warmly by the small local population. 

1 April 1941, Heinkel HE III Crash Site

The second site, known to the locals as the Forgotten Heinkel is a little trickier to find. I'd planned a round-the-island walk and luckily, Simon Dell, one of the Lundy island Ambassadors was on hand to give me some advice. What remains of the second aircraft is a couple of hundred metres from the coastal path underneath a rocky outcrop known as Parrot Rock. Access was easier than I thought though I wouldn't recommend it for anyone suffering from vertigo! The story of this aircraft is also revealed in the Eagles over Lundy booklet. The remains of one of the Heinkel's two engines is jammed between a couple of rocks and there other pieces of the aircraft scattered around. 

Heinkel HE III Engine Crankshaft

This German raider had been operating with two other aircraft and after crashing, locals surmised (incorrectly) that it had attacked the Kestrel, a trawler, some four weeks earlier. The trawler's first mate had been fatally injured and the skipper had managed to put his stricken vessel onto the landing beach. The crashed German aircraft had four ships painted on its tailplane which attracted the attention of locals still shocked by the Kestrel incident. Three of the Luftwaffe crew had bailed out over the sea but the pilot and his observer who had tried to guide the plane to safety were killed instantly when the plane crashed into the soaring west side cliff. 

Parrot Rock, the Crash Site is bottom left

The surviving three aircrew were apprehended by four Royal Navy men who were incensed by the earlier incident and made their anger apparent. Eventually the Luftwaffe men were put aboard a boat called the Lerina for onward transportation to North London's Trent Park House interrogation centre and then on to a PoW camp. Investigation revealed that this aircraft had been involved in a successful attack on the MV San Conrado, a 7,892 oil tanker on passage from Curacao to Milford Haven. The second Lundy Heinkel had been hit by anti-aircraft fire which damaged the starboard engine. Whilst attempting to go over the cliff and crash land on the centre of the island, the pilot lost 75 feet of height and, as described above, hit the cliff.


Friday, 6 August 2021

The Battle of Sedgemoor - 6 July 1685

Whilst overseas travel is still problematic, there are plenty of opportunities to walk battlefield sites in the United Kingdom. England's last proper battle was fought near Bridgwater on the Somerset Levels and I recently revisit the Battle of Sedgemoor site in the company of a local guide and fellow miltary history enthusiasts.

Battle of Sedgemoor Monument

The accession of James II to the throne in 1685, following the death of his brother Charles II, was controversial. James was a Catholic and many feared that under his reign Non-conformists and Anglicans would be persecuted. For many, the answer lay in Charles's illegitimate son, the Duke of Monmouth, who had been brought up in the court and had earned his spurs commanding the Royalist forces during the third Dutch War and in defeating the Scottish Covenantor Army at Bothwell Bridge in 1679. 

Arms of James II and The Duke of Monmouth

The West Country appeared to be a hotbed of dissent and after the Duke of Monmouth had landed at Lyme Regis and gathered support in his ride north it would seem that the country was ripe for rebellion. The gauntlet was thrown down on the pavements of Taunton where the young pretender was proclaimed King in front of an adoring crowd. The flags presented to him by the Maids of Taunton, 13 schoolgirls from leading local families, would serve as potent rallying points and by the time he reached Bridgwater, the Duke had acquired an army numbering about 10,000, including over 600 irregular cavalrymen and a small artillery component.

Map of the Battlefield in Westonzoyland Church

However, James II had responded with alacrity. A well-equipped Royal Army under the command of the Earl of Faversham was speeding towards the West Country. The five regiments of foot soldiers led by the highly respected John Churchill were quickly in theatre, speedily followed by the Earl of Oxford's Horse (approximately 400) and three troops of Horseguards (approximately 200 each). Finally a large artillery train was on its way from Portsmouth and 1500 Wiltshire militia were on notice to join the fight. 

Filled with confidence, the rebel army moved north, intent on taking Bristol. Moving to the east of the city, the rebel army had some success against the Royal Army during a skirmish in Keynsham. however, as they regrouped and sought support from neighbouring areas, the tide began to turn. Monmouth's action in the South West was to be complemented by a rebellion in Scotland provoked by the Duke of Argyll. The failure of this second thrust, the growing power of the Royal Army, bad weather and growing disillusionment with the wisdom of supporting the rebellion began to impact Monmouth's army. 

Monmouth's Route

Seeking to revitalise his waning support, Monmouth withdrew to the rebel heartlands. Returning to Bridgwater just 12 days after his arrival, the reception was cooler. However the diminished rebel army was still a potent force and with the Royal Army encamped in the village of Westonzoyland, a few miles east of the town, Monmouth spotted the opportunity to launch a daring night attack. If he could defeat this Royal Army in the field then the tide of support would once again run towards him. The rebel army moved out at around midnight on the 5th July 1865. With the help of a local shepherd guide (Godfrey) they would bypass the Royalist village of Chedzoy, traverse the marshy Somerset levels and cross the Bussex Rhine (a wide ditch) before sweeping into the enemy camp and catching the sleeping Royal Army unawares. 

The Royal Army Camp

Surprise was everything but sadly for Monmouth he lost the initiative in the early hours of the morning. A Royal Army picket raised the alarm by firing his musket and the Royal Army quickly formed up ready to repel the attack. It was a foggy, dark night and realising the element of surprise was lost Monmouth had no choice but to commit to the battle anyway. He launched his cavalry at the enemy camp using two crossings across the Rhine. In the poor light the horsemen setting out for the Upper Plungeon crossing bumped into a Royal cavalry patrol. They missed the bridge and rode across the front of the Royal Army. The inexperienced horses and horsemen scattered in the face of concerted Royal musket and artillery fire. The fleeing rebel cavalry rode headlong into two of the advancing rebel foot regiments and chaos ensued. The second rebel cavalry troop was successfully seen off as well. 

Battlefield Walkers

Regaining their composure the rebel army rallied for an attack and their three small cannon, manned by professional Dutch gunners, caused Dumbarton's Royal Scots to give ground. The Royal Army soon began to dominate the battlefield however, after Churchill moved Kirke's and Trelawney's regiments from the left to the right hand flank to cut of the eastern Rhine crossing. With the aid of six Royal artillery pieces the remainder of the Royal Army were fed into the fight. The rebels fought bravely but over time the discipline and fire-power of Churchill's professional troops took their toll. As dawn broke, the Royal Army crossed the Bussex Rhine and the rebels were routed. Legend has it that some 1,000 were killed in what the locals still call 'Grave Field'.

Replica Cannon in the Visitor Centre

After the battle 505 rebel prisoners were lock up in Westonzoyland Church. Five of these died of wounds and twenty were hung in the vicinity. Sadly no vestiges of these burials remain but nearby in Middlezoy Church one can find the grave of Louis Chevaleir De Misiers who 'behaved himself with all the courage imaginable against the King's enemies commanded by the rebel Duke of Monmouth 'whilst in the service of the English'. For those who escaped the battlefield retribution came in the form of the Bloody Assizes and the energetic pursuit of the rebels by Judge Jeffrys. Many were hung without trial, others were transported as slaves to the West Indies and Monmouth himself was beheaded in front of a large crowd on Tower Hill, London. 


The Frenchman's Grave - Middlezoy Church

In recent years a Battle of Sedgemoor Visitor Centre has been installed in Westonzoyland Church. It has a number of interactive displays and numerous artefacts associated with the Monmouth Rebellion. The battlefield is well-signposted and easy to access.


Monday, 28 June 2021

At War! Bougainville: Jungle Attack


In 2014 I was contacted by Brigadier General Ronald R. Stockum, who was born on the 8th July 1916, just one week after his father Sergeant Reginald G. Bareham was killed in action on the first day of the Battle of the Somme whilst serving with the 11th Battalion, Suffolk Regiment (the Cambs Suffolks). Since then I've got to know the General well and am proud to know him as a friend. Aside from the interest in his father, 'Van' as he is known, is a great source of inspiration and knowledge having had a long and distinguished military career. Indeed when I was studying for my MA I was able to tap into his memories of combat during the Second World War Pacific Campaign at which point he was serving with the US Marines as a young officer. Van, now almost 105 years old, continues to write a column in his local newspaper and I thought I would share his account of the Battle of Bougainville which was republished recently.

Here it is .....

Brief History
The island of Bougainville is named for French admiral and explorer Louis Antoine de Bougainville, who visited there in 1768. Japan invaded the island in 1942 to provide a support base for operations elsewhere in the South West Pacific. The Allied invasion began in 1943 with full control of the island not re-established until 1945.  Today, the region is divided into three Districts: the North, the South and the Central Bougainville Districts. 

French Admiral Louis Antoine de Bougainville

Jungle Attack 
On November 6, 1943, the 1st Battalion, 21st Marines debarked into landing craft from high-speed transports, actually old converted destroyers, and landed in reserve on the Torokina beaches.  My thoughts, as I faced infantry combat for the first time, were mixed.  While anxious to prove myself, I was apprehensive about the uncertainties ahead and in my inner thoughts hoped to find the battle won and the island secured.
Promptly at 9:55 a.m., the shells of supporting artillery commenced their welcome shrieks overhead.  This is it, I thought, as the chatter of machine guns joined the crescendo to signal two minutes to go!  I made a quick visual check of my weapon and equipment, being unconsciously joined in this by a thousand tense, serious and determined men. As I glanced at my watch, the minute hand seemed to race toward ten o'clock.

US Marines - Bougainville Jungle, 1943


An enormous silence signalled H-Hour, 10:00 a.m., the time of our attack. The battalion sprang to life.  Small patrols moved out and were soon swallowed by the dense jungle. They were followed by the battalion in seven files; each preceded by scouts and a team of machete-wielding marines.
I slipped into my accustomed place near the battalion commander in the center column.  There was little difference between this actual attack and the many that we had rehearsed during training on Guadalcanal. The shade of the jungle was just as friendly and welcome as ever, but what else might it shelter and conceal?  Contrary to popular belief, the jungle is relatively cool, the towering growth providing shelter from the tropic sun. 

A copy of the jungle attack formation carried in combat by the author, November 1943 

An Incredible Sight
 
Soon after initiating our attack, we encountered an incredible sight!  Covering an area less than the size of a football field was a ghastly tableau of a Japanese assembly area. It contained at least three hundred of the enemy in all sorts of grotesque poses.  Some had died clutching shovels, desperately in the act of digging in.  Some had been surprised while eating what became their last meal.  Others were stilled in the act of undoing their packs.  The stink of putrefaction was not yet in the air, but dominating the dreadful scene was the spectre of death.

I silently thanked God for the barrage which had destroyed this well-equipped and heavily-armed force before it could extract its toll from the ranks of the First Battalion.

Brigadier General Ronald R. Van Stockum (June 2021)

Friday, 26 March 2021

The Smoke Lane Heavy Anti-Aircraft Battery, Bristol (1940-45)

To counter the six major air raids on Bristol during the Second World War, the 'first to be built' heavy anti-aircraft batteries in close proximity to the city deployed twenty four 3.7" heavy anti-aircraft guns - four for each of the six batteries. The firing during the raids must have created quite a cacophony - on the 11th April 1942 'Good Friday Raid' on Bristol in 1941 the guns fired a total of 6765 rounds. Whilst only two Luftwaffe aircraft were shot down by the Bristol HAA batteries throughout the war, they played a major part in the defence of the city - forcing the raiders to fly high and presenting a picture of defiance to a frightened population. 

The Magazine at Smoke Lane HAA Battery

Remnants of five of the six original batteries - Easton-in-Gordano, Portishead, Rockingham Farm (Smoke Lane), Cribbs Causeway, and Purdown - are still extant and two are accessible to the public - Smoke Lane and Purdown (both of which are scheduled monuments). The sixth, at Winterbourne, I've not yet found. By the end of the war the total number of HAA batteries protecting Bristol under the auspices of RAF 11 Group (West) numbered twenty. This post covers the Smoke Lane site which has been opened up to the public with the help of English Heritage, who have installed a very helpful information board and financed a number of access paths. 

Smoke Lane - Info Panel
Although accessible it is not the easiest place to find. If travelling by car come off the M5 at Junction 18, and head towards Bristol Port. At the roundabout in front of the Port gates take the last exit and head north along St Andrew's Lane (the A403). You will see the railway tracks on the left and after about half a mile or so you will reach another roundabout. Take the first exit into what looks like a factory complex. The road which is bordered by metal fencing on both sides, will take you straight to the site. 

Once you've parked up, go to the information board in the north east corner. You will see the old magazine on your right and the remains of the control buildings directly in front. The four gun positions can be easily discerned and whilst three have been filled in with building debris, the fourth on the right hand side has been cleared and is accessible. I would describe the condition as 'fair' - a number of the other HAA sites around Bristol are in much better shape, but not all are easily accessed.

Gun Position No. 4 at Smoke Lane

The interpretative aids on the site are very helpful. For example the strange triangular indentation on the floor in one of the control buildings were footings for a Predictor machine (called a 'Kerry' after its inventor Major A.V.Kerrison at the Admiralty Research Laboratory, Teddington). The height, speed and range of a Luftwaffe aircraft was predicted and the information passed to the gunners who would do their work. 

Floor of Predictor Building
ATS Predictor Operatives
The Smoke Land HAA complex was once much larger. There was a radar station to the east, and a hutted camp nearby. The site was fully operational from 1940 and initially manned by the 98th HAA Regiment. It protected the northern end of the Avonmouth Docks firing out into the Bristol Channel. 

There are a number of other interesting buildings on the site - albeit in a collapsed or sem-standing state. As with similiar battery locations elsewhere, various building were used for storage, ablutions and offices and the remains of a brick built hut, which may have been used for one or more of these purposes, can be seen at Smoke Lane. Other structures at Smoke Lane including a concrete platform for telescope use and a building used to house a height finder instrument (which was used in conjunction with the predictor). There's also a slightly larger structure thought to have been a command post. 

The remains of the Control Buildings at Smoke Lane

The magazine, which can be accessed via a path at each end, consists of a corridor and five ammunition storage rooms - fenced off for safety reasons. The guns were served with high explosive (HE) and shrapnel 28lb shells. The fuses worked on timers with the standard maximum being 43 seconds. The bulk of the ammunition was stored in the magazine with supplies for immediate used kept in the bins which surrounded each of the gun pits.

The Magazine at Smoke Lane HAA Battery

The 3.7" guns themselves were relatively modern for their time. First deployed in 1938 (and two years later at Smoke Lane) their effectiveness was incrementally improved over the course of the Second World War. By 1945 they could fire 32 rounds per minute through auto-loading and could hit targets of up to 32,000 feet - though they rarely did when in action.

As an aside, The Shopland Collection, based in Clevedon - have a General Electric 3.7" Heavy Anti-Aircraft Gun which is operational (blank firing). Shoplands can provide a crew and will pull it using an AEC Matador Tractor. It is available for demonstrations and is often seen at the annual 'Dig for Victory' event which takes place on the Ashton Court Estate near Bristol.

For a post about the Purdown HAA Battery click here - Bristol's Air Defence (1940-1945)

Wednesday, 24 February 2021

The Foolish Young Officer (1917)

The following is transcribed from a recording that my Great Uncle, Alf Curme, made in the early 1980s. The story was one of his favourites and he would often tell it when in the company of friends or family. His thick Hampshire burr was a pleasure to listen to - and is it now on the original recording.

The Hampshire Yeomanry, A Squadron, Petersfield


At the time of this incident Alf Curme was serving as a Private with the 15th (Hampshire Yeomanry) Battalion. It occurred sometime after September 1917 following the 'dismounting' of the Hampshire Yeomanry. Alf was obviously delighted to have 'got one over' on an officer. He may have saved a few lives in doing so.

Alf, with his sister Nell

When you went up the line through the Ypres Salient, to the tip of the 'U' you know, where our fellows were, quite a lot, there was a timber track. The roads were so muddy they just disappeared into slush - there was no drainage system. At one time we were just past 'Dicky Bush' lake (Dikkebus) - it was a horrible spot - just grease and mud. Your horses used to go in up to their knees trying to pull the limbers through. Anyway they decided to make a timber track and they got lengths of pine and laid them all out. What a game that was! The stuff used to move about.

There was one very, very strict rule and that was - never stop on the track. At the start of the timber road there was always a military policeman. And he always stopped everybody and told you when to go. He would stand there for eight hours taking his turn. When the German's were shelling they almost

always used to shell in groups of six. He would know where the last six dropped having counted them. When the last one went off he would say "hop it, get over that track fast!".

The great thing was never to stop on that track because if you did you couldn't get anything past either way. I was in charge on this particular night. We were taking field cookers up to our blokes because they were in the reserve trenches. I had four field cookers and the usual limber and GS wagon and all that sort of thing. Maltese carts with all the Red Cross stuff in. I had probably fifteen to twenty vehicles. I got about a quarter of the way along this track and there were some bloomin' artillery blokes with guns - limbered up - with their poles down and their bloomin' nose bags on. They were on the track - half way along!

Alf Curme, Hampshire Yeomanry
I rode on ahead when I saw this lot and said to one of the gunners; "what the hell are you doing here?". He said "we've got a young officer up in front and he's trying to rule the roost mate, he stopped us all and started the feed - told us the horses will be safe on here". He paused and then added a word of warning "don't you be saying a word to him".

I said; "by God, I'll say a word - where is he!". I went on ahead with all my usual kit on - tin hat on the top and all my slings around me and the rest of it. I found this officer bloke and I said "what bloody Brigade do you belong to? I'll bloody well report you!". For good measure I added "do you know you're infringing the rights of every damn trooper?". I put the fear of God into this fellow. Then he suddenly said to me "what rank are you?". "Don't you worry about bloody rank" I said. We don't all carry it on our great coats. You get these bloody things limbered up and out. Hop it!". He damn well moved quickly! He cleard off up that track and I thought to myself you cheeky blighter.

I was so mad, I couldn't help it - to see the young fool had done that. He'd already been warned by his own Sergeant that the track wasn't passable.

Alf (right) with his brother, Charles
Note: Alf went to The Sudan after the end of the War where he was awarded the Order of the Nile (5th Class) for his help in building the country's railways. Later he served in the Allied Control Commission, helping to rebuild Germany's railway network in the aftermath of the Second World War. He and his wife, Josephine, had one daughter Joan. I remember Alf as an affable, modest and practical man who was quietly proud of his achievements. 

The original recording can be heard here

To hear Alf's account of an encounter with German Uhlans click here.

Tuesday, 16 February 2021

Starfish Sites near Clevedon (1940 - 1944)

During what history may record as the Great Pandemic of 2020 to 2021, restrictions on travel have meant that my battlefield walking has been confined to the local area. Whilst this has been frustrating to say the least, it has given me the opportunity to make new discoveries close to home. The nearby village of Kingston Seymour is tucked away on flatlands near the mouth of the River Yeo and, like virtually every other town and village in the country, there is military history to be discovered - always in the local church, and often elsewhere. 

The War Memorial, Kingston Seymour

I started my walk at the very fine Kingston Seymour war memorial. A 14th or 15th Century stone cross has been repurposed as a memorial to those who died in the Great War of 1914-19. After admiring the four carved figures representing Victory, Peace, St George and St Michael and visiting the local church I headed off to see if I could catch a glimpse of the Bristol Channel from the fields beyond the village. Sadly, access to the foreshore is impossible but as I was strolling back I noticed what looked like a military bunker half way up Yeo Bank Lane. 

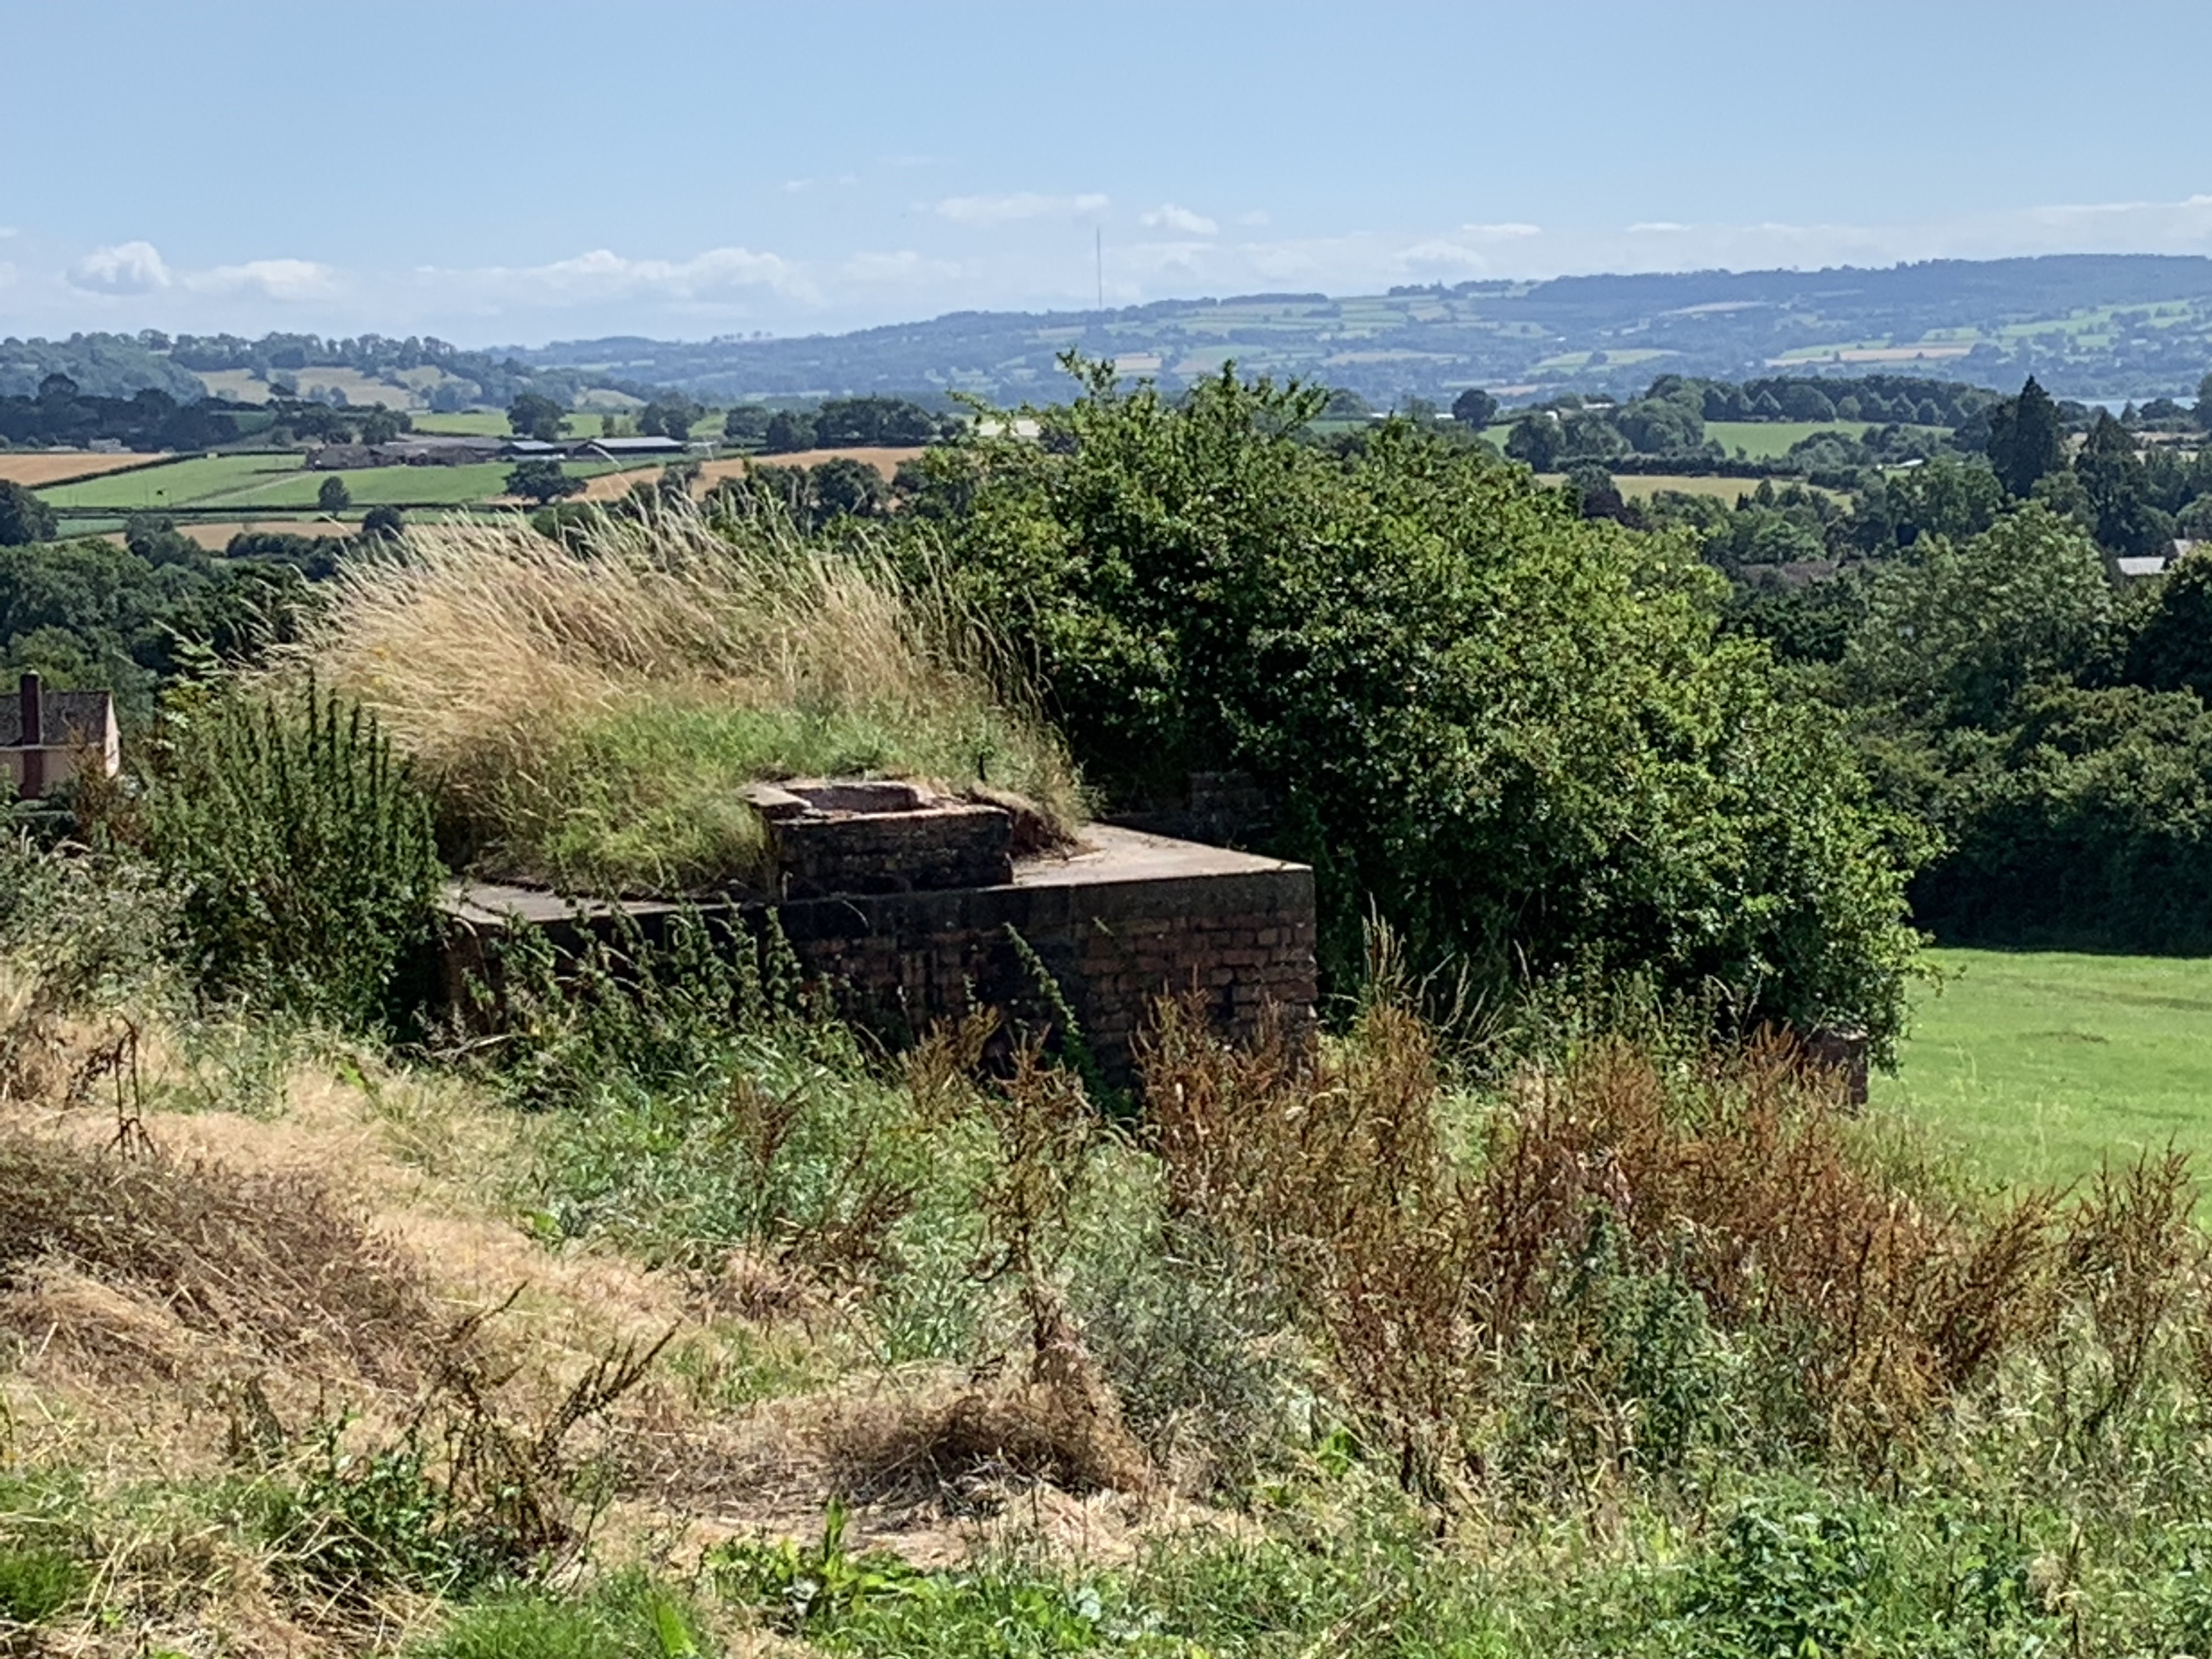
Private Air Raid Shelter - Kingston Seymour

Later, in the evening, I discovered a pamphlet entitled 'Battle's Over, Long Historical Trail' produced by the Kingston Seymour History Group. The bunker I'd chanced upon was in fact built by a local farmer, Don Griffin, in 1941. He wanted to protect his family given that the village had been designated a combined QL and QF decoy site - the latter sometimes referenced as SF or Starfish

I was aware of the so-called Starfish sites around Bristol. Indeed the first one to be built in the United Kingdom is situated on nearby Black Down. Of the 18 QL and QF sites built to protect Bristol and Avonmouth, four are in the vicinity of Clevedon - Kingston Seymour, Priddy, Downside and Kenn Moor. 

Given the lockdown restrictions in place, two are within my reach - Kingston Seymour and Kenn Moor. A second walk along the lanes at Kingston Seymour took me up to the boundary of Wharf Farm where the Starfish site was centred. Sadly, the landowner does not allow access so my investigation had reached a bit of a dead end.

What were QL and QF sites? As the Luftwaffe bombing threat became more potent, particularly after the devastating night raids on Coventry on 14-15 November 1940, two new types of decoy were devised. The 'L' stood for lighting, the 'F' for fire and the 'Q' (or sometimes 'S') was the code designation. In the case of the QL sites, they were designed to mimic the reaction of an industrial area to a bombing raid. Lights would be dimmed or extinguished as they were in the case of factories and military installations. In simulating this, the idea was to draw bombs away from the real targets and onto areas where little harm could be done. The larger scale QF sites came into play slightly later
on the timeline. They would be lit after bombs had hit the real target in the hope that at least some of the aerial attack could be diverted.

Decoy Sites

The map above shows the concentration of decoy sites around the city of Bristol. The city was 'target rich' for the Luftwaffe - aside from the conurbation itself the Bristol Aircraft Company's factory at Filton, the National Smelting Plant at Avonmouth, the Electric Power Station at Portishead and the Parnell Aircraft facility at Yate were significant contributors to the war economy. The black circle denote QF sites and the triangles mark the QL installations. 

Not to be defeated by my failure at Kingston Seymour, I set off for to see if anything survives at the Kenn Moor Starfish site nearby, a short distance down Claverham Drove. Quite often when I'm walking such sites, I have to rely on my research and my imagination but on Kenn Moor I didn't need to resort to either of these tried and tested methods. The evidence is there, plain to see ... and explore.

Starfish Control Bunker

Starfish Control Bunker - Side Elevation

Although the turf covering has gone, the blast shelter and generator house at Kenn Moor is still intact. The blast wall in front of the main entrance has been removed but the one facing onto the QF field is in relatively good condition. The structure has two rooms - the first for personnel and the second (on the left in the picture above) for a generator. As an aside, there is a vast badger sett directly adjacent to the building - which presumably extends underneath the concrete floor.

The lights and fires used at such sites were ingeniously configured to replicate the real thing. Furnace and locomotive glows were simulated using red and amber lights shining onto sand, bundles of wood would be burnt, machine oil would be lit and carbon arcs were used to simulate flashes. At the Kenn Moor site there are two concrete holders in a nearby field - each consisting of two small parallel walls and a longer base. The 'War in Kenn' History Project has surmised that they were probably built to support baskets of wood shavings - amongst other purposes.

Material Holder - Kenn Moor

The number of Starfish sites built across the country increased throughout 1941 - rising from 108 in March to 164 by the end of the year. The first were constructed around Bristol, indeed the very first QF firings occurred during a raid on the city on December 2nd when 66 high incendiary bombs fell on the decoys. In the excellent book 'Somerset and the defence of the Bristol Channel in the Second World War' Messrs Dawson, Hunt and Webster say that after the war the Air Historical Branch estimated that 5% of the bombs dropped on Britain were diverted by decoys. According to documents released in 1979 an estimated 3160 injuries and 2596 deaths would have occurred had the decoys not done their work. Bristol's decoys were amongst the most effective and it is true to say therefore, that the Starfish sites around the city saved lives in the vicinity.

Aerial Photo of Starfish Site - Location Unknown

The photo above shows a typical Starfish site. The site would have a control point and a series of metal, concrete and asbestos structures each designed to contain inflammable material or devices for illumination. Each site had a telephone link to a local command centre and there were strict controls around when to light up particular sites. Timing was crucial as the raiders need to see a decoy site in operation as they approached the area of the real target. 

Interior of Kenn Moor QF Control Centre

By the end of 1943 the sites had achieved their purpose. The number of larger scale bombing raids diminished and other defensive measures had been deployed. Both Kenn Moor and Kingston Seymour were decommissioned around the end of that year. As far as the latter is concerned the (up to) twenty four RAF personnel manning the site who were billeted in the village left to take on other duties. The evidence of this epic endeavour remains however - if you know where to look and if the land is accessible. Let's hope that some of these unique structures are preserved for posterity. 

After the Bristol Post published my article about the local Starfish sites, a 90 year old retired electrical engineer contacted me. I subsequently spent a few hours with Frank Newberry, who was able to give me some insight into how the sites worked. The sites would typically be manned by a a couple of RAF personnel who would 'fire' the installations upon receiving orders from their local HQ. The main sites were fired by means of an old fashioned Post Office uni-selector feeding a control box in the middle of the site. The sites were set up in two parts, so they could be used on two nights, which helped with the rebuild. A typical site consisted of four sets of twelve containers each filled with inflammable debris such as wood or textiles. There would be an accelerant such as oil or petrol. Each 'basket' consisted of an oblong open topped container made of what looked like roofing material. A detonator would be 'plugged' into the bottom of the container and a wire run back to the control box. Frank helped with the installations and was part of a team that would reset the sites once they had been 'fired'. 

Chew Magna Control Bunker
Generator Room, Chew Magna

Since writing this piece, I have visited the Control Bunker at the Chew Magna QL site. Frank Newberry told me that on one occasion when he came to reset the circuits there, he was confronted with multiple bomb craters - definitive proof that the decoy had worked. See pictures above.